|
The first page of this Tutorial
I've had several requests asking how I painted my Deathwing. I can empathise with this, since Bone can be a very difficult colour to do properly. It was frustrating for me when I was looking for painting guides and tutorials online and couldnt really find any, back when just started on my Wing. Finally I just used a combination of several techniques to come up with my current style.While it can be time consuming, I feel that with a Deathwing army it is worth the investment to make a good looking force- especially since there are so few models to paint! Others prefer Darkseer/Midnight Resistance's slightly darker style- I would recommend this if you are after a faster method that still looks great.
If you are after the basic methodology without having to read the extensive tutorial, my technique for bone can be summarised as: Skull White -> Bronzed Flesh -> Watered Flesh Wash -> Bubonic Brown -> Bleached Bone -> Bleached Bone/Skull White -> Skull White.
The following pages describe this technique, as well as several hints and tips, in more detail. It also describes the methods used for other details on the model. Feel free to use as many or as few of the techniques described here as you desire.
Some notes:
-Click thumbnails for larger view, or in some cases, several photos showing the colour progression.
-Where photos of arms or body aren't shown, assume the same technique is done to them as is done to the shown area, unless specified.
-All paint colours are described in terms of GW's range. I use several Vallejo paints in combination with GW's, but I will keep it simple and just use the equivalent GW names.
|
|
|
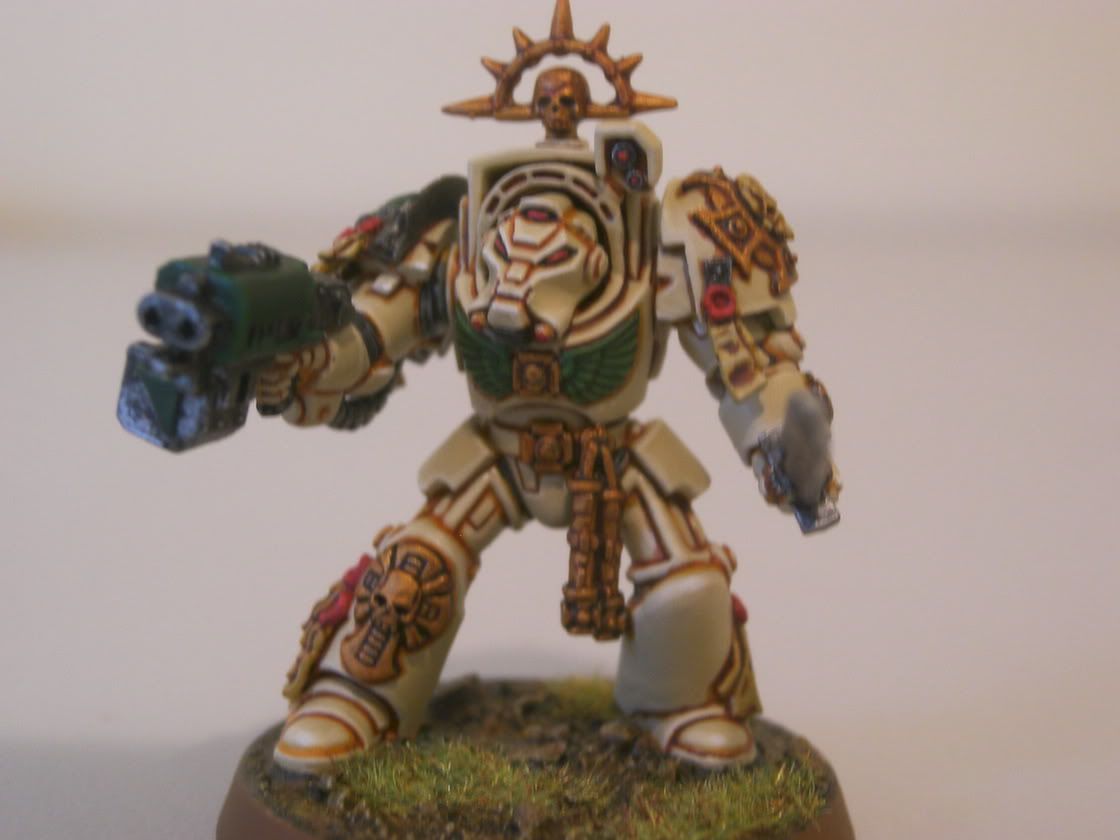
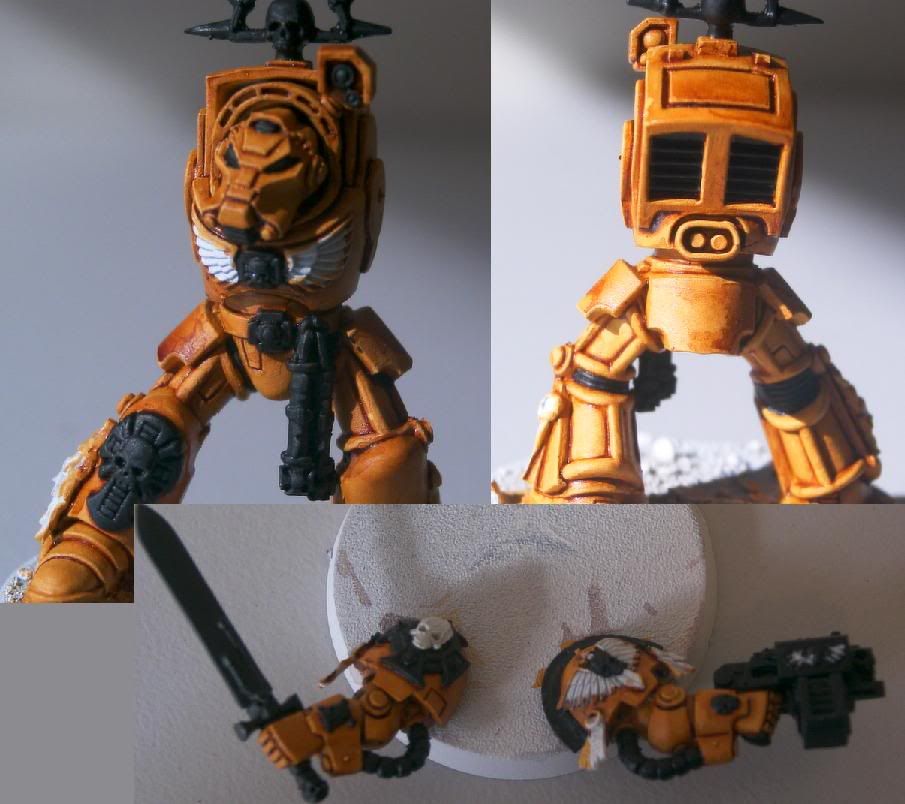
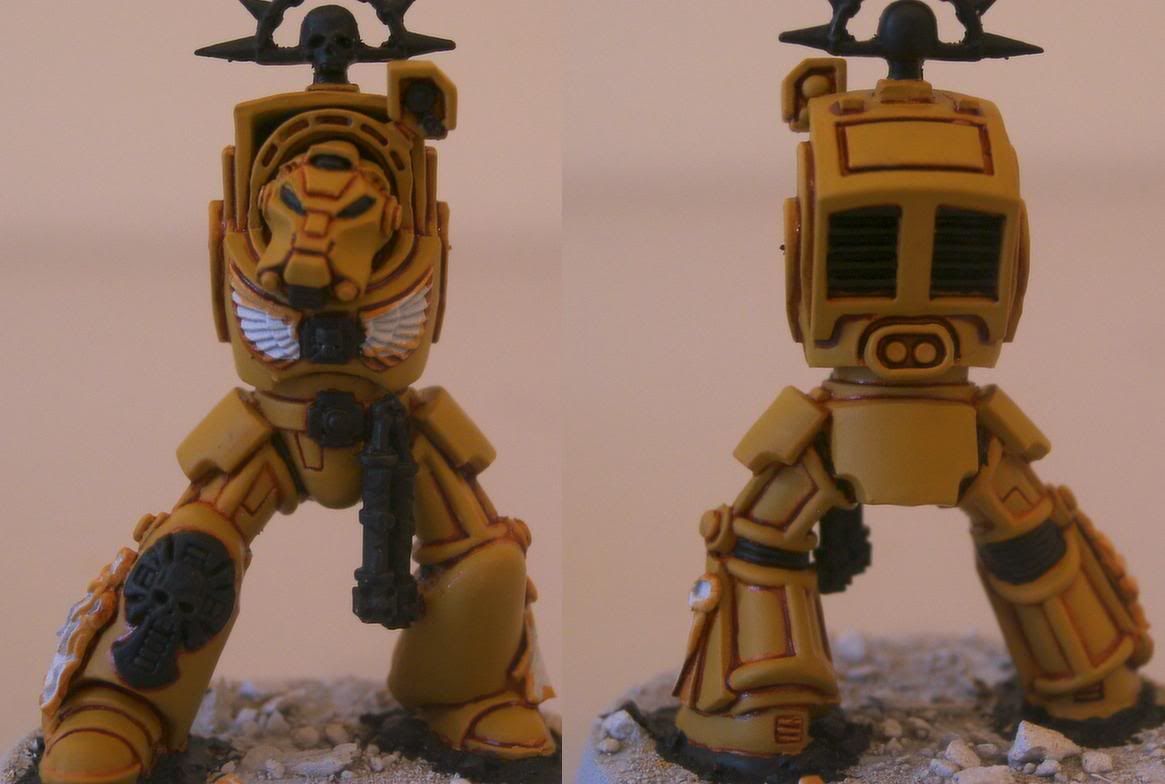
<- This is the model we will be painting. Click for larger version.
|
|
|
Step 0: Construction and Undercoating
The first thing to do, obviously, is assemble your model. I’ve done my Terminators slightly larger than normal, with 1mm spacers under the feet, at the connection between legs and torso, and also at the shoulders (as you can see from the photo to your left). In addition, the arms are not glued to the body until the entire model is finished; instead they are ‘dry pinned’, with only the arm side glued in. This allows for much easier painting of those hard-to-reach places. After construction, undercoat the model. I assumed you wouldn’t need a picture of this. For Deathwing, use a white undercoat.
|
|
|
Step 1: Bronzed Flesh
The first step is to simply paint on a layer of Bronzed Flesh over all the armoured areas. This should be watered down slightly, as we don’t want details obscured. In addition, try and leave the areas that will be a different colour (Green, Metal, etc) white, although you need not be too concerned about going over the edges. |
|
|
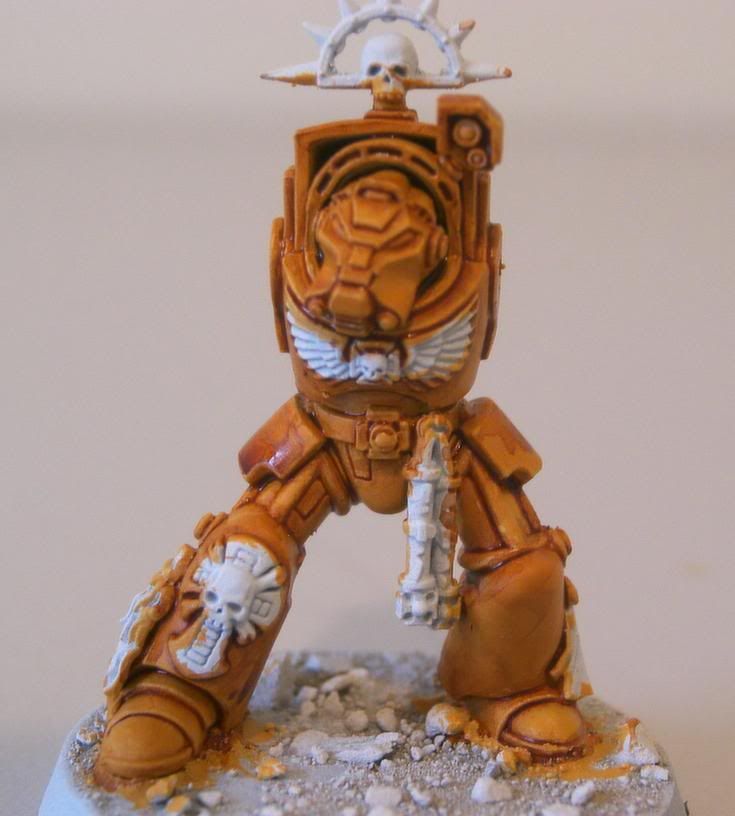
Step 2: Flesh Wash
After completing a layer of Bronzed Flesh (and giving it plenty of time to dry! Wet paint and inks don’t like each other very much), crack open your brown ink. I use Flesh Wash, as its my favourite all-round ink. Chestnut Ink would probably also work fine here. The most important thing to do is WATER DOWN A LOT. We want the recesses to be a very light brown rather than a dark brown. Too dark and there will be too much of a contrast between the top layers of bone and the recesses.
|
|
|
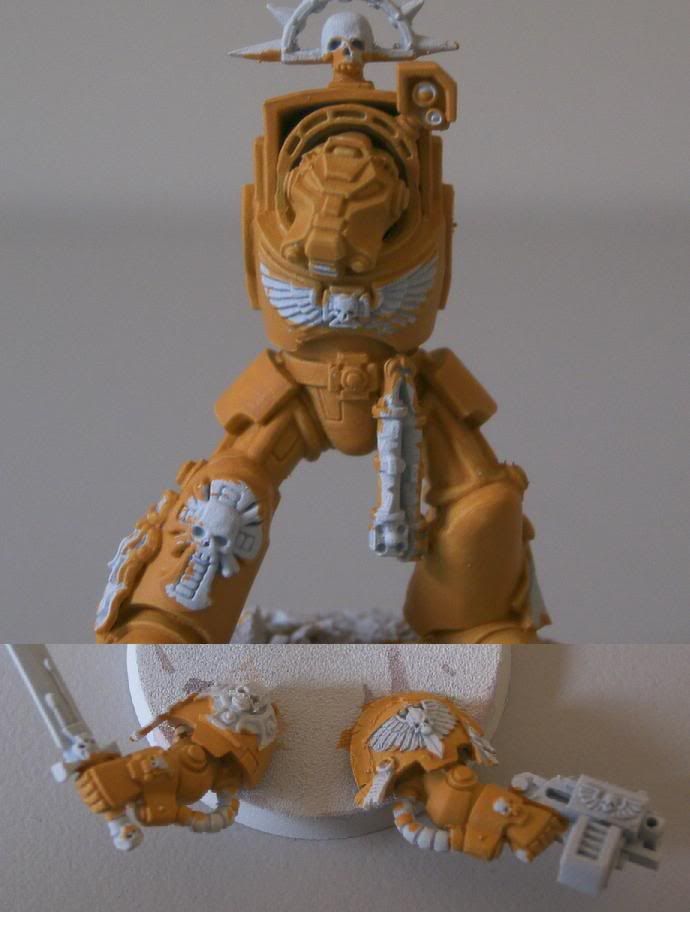
Step 3: Chaos Black
Now that the ink is dry, its time to start putting on the black. Basically, this will go wherever there will be metallics (Gold or Silver) and also around the eyes, lights, joints, and any other colour you really want to stand out. If you are using Forgeworld shoulder pads, I find it helps to do a thin line of black where the sword meets the feathery-wings. This will help with separating the green and red later on. This also goes for the breastplate. Again, keep the paint thin-ish and avoid blacking areas that will be a lighter colour later on (such as green or red). Try not to make mistakes, but if you do don’t worry too much. I often go ‘over the lines’ and as such I have contingency steps later on for virtually all the errors you could potentially make. |
|
|
Step 4: Bubonic Brown
This is the part where we really start working on the armour. Get out the Bubonic Brown and thin it a bit, then start going over all the raised sections of armour. Leave the inked recesses visible at the very bottom, but you can go down the edges a bit. Examine the photos to see how far to go. Now is a good time to clean up the black you may have got on the armour-proper. I don’t paint the ‘vent’ type detail on the back of the feet as there is a high potential for error and I think they look fine as is. You are welcome to paint them should you desire.
|
|
|
<-Click to continue. |
|
|